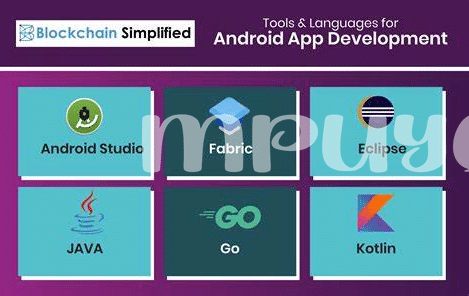
- Setting the Scene: Android Studio Essentials 🛠️
- Embrace the Design: Ui/ux Best Practices 👁️
- Understanding Android Sdk: Your Building Blocks 🧱
- Threading and Asynchronous Tasks: Smooth Operations ⏳
- Debugging Tips: Squashing Bugs with Ease 🐞
- Deployment: Launch Your App Successfully 🚀
Table of Contents
ToggleSetting the Scene: Android Studio Essentials 🛠️
Imagine you’re about to build a dream home — but before you start, you need the right tools and a solid foundation. That’s exactly what Android Studio is when it comes to creating your own Android app. It’s the main workbench where all the magic happens. With a user-friendly interface and an array of powerful features, it’s like having a high-tech toolkit at your fingertips. From coding to design, it handles it all. 🛠️
Now, delve into the vibrant world of UI/UX design and coding with a clear layout where each tool has a purpose. The layout editor makes dragging and dropping UI elements a breeze, while the code editor helps in writing and keeping your code neat. You also get a handy emulator to test your app without needing a physical device. Below, see a table showing some essential components of Android Studio and their functions:
| Component | Function |
|---|---|
| Layout Editor | Drag and drop interface for designing UI. |
| Code Editor | Writing and managing your app’s code. |
| Android Emulator | Testing your app on different Android devices virtually. |
| APK Analyzer | Inspecting your app’s APK to improve app size and performance. |
| Gradle | Automating and managing the build process. |
| Profiler | Monitoring app’s CPU, memory, and network usage in real-time. |
With these tools laid out, you’re well on your way to sculpting your masterpiece. The journey from concept to creation is thrilling and with Android Studio, it’s as intuitive as it is exciting. 🚀👁️
Embrace the Design: Ui/ux Best Practices 👁️
When diving into the realm of app creation, the visual appeal and the user journey within your app can make or break its success. Imagine stepping into a room that’s both inviting and easy to navigate; that’s the kind of experience you want to offer in your app; hence, attention to design details and user experience is crucial. The magic begins with a user-friendly layout: opt for a clean interface with intuitive navigation. This doesn’t just guide users through actions effortlessly but encourages them to engage more with your app. Including legible fonts, high-contrast text, and accessible elements ensures that everyone, including users with impairments, can use your app comfortably.
In addition to a visually pleasing interface, understanding your users’ needs is key. Incorporate thoughtful touches like customization options and remember that users love apps that learn and adapt to their preferences. Animations can enrich interaction but keep them subtle so they don’t distract from the primary purpose of your app. Moreover, ensuring your app runs smoothly complements the aesthetic work you’ve put in. Nobody likes a sluggish app, just like no one enjoys slow service at a fancy restaurant. And speaking of quick service, keeping your app running at top speed is important. In fact, a good maintenance tip is to occasionally clean out the cache. Wondering what is the best cache cleaner app for Android in 2024? Check out the top 5 apps updated to choose the right one. All these design and interaction factors play together to create an app that’s not only functional but a joy to use.
Understanding Android Sdk: Your Building Blocks 🧱
Imagine you have a big box of Legos, each piece ready to help you build something awesome. That’s what the Android Software Development Kit (SDK) is like for app creators! It’s full pack of tools that help you construct your app step by step. 🛠️ From the basic layout to the actions your app can perform, the SDK has everything you need. You can think of it like the ingredients in a recipe; without them, you can’t cook up your app!
Now, the SDK isn’t just one thing; it’s made up of different parts that work together. 🧩 For starters, there are Libraries – these are like the pre-built sections of a model kit. Libraries save you time because you don’t have to code common functions from scratch. Then you’ve got the Debugger – that’s your trusty detective, helping you find where things have gone wrong when your app misbehaves. And don’t forget the Emulators, which let you test your app on different phone models right from your computer. It’s like having a bunch of different phones to try your app on, without having to buy them all! By getting to know the SDK and all of its components, you’re equipping yourself with the right tools to build something that’s not just functional, but fantastic. 🏗️
Threading and Asynchronous Tasks: Smooth Operations ⏳
Imagine you’re in a bustling city, where everything needs to happen fast and at the same time. That’s similar to how your Android app needs to work. Under the hood, your app has to juggle many tasks without a hitch. That’s where threading comes in, like the city’s roads, allowing information to travel smoothly without clogging up the main street, or in this case, the main thread. By wisely using threads, your app can perform background operations, such as downloading data or performing complex calculations, without making your users wait.
As you continue to build and refine your Android masterpiece, remember to think about the user’s experience. If your app is slow or unresponsive, users just won’t stick around. That’s why managing tasks in the background is as essential as the design on the front. To keep your app’s performance sleek, you’ll have to master asynchronous tasks. Async tasks help with tasks like accessing the internet or a database while keeping the app running smoothly. And if you’re looking for the right tools to keep your app’s internal gears clean and efficient, consider looking into what is the best cache cleaner app for android 2024 top 5 apps updated. A well-chosen cache cleaner can give your app that extra edge in speed and reliability that could make all the difference to your users. 🚦🔧🌐
Debugging Tips: Squashing Bugs with Ease 🐞
Imagine this, you’re working on crafting your very own Android app, pouring your creativity and skills into every feature. But then, you hit a snag – a bug! 🐞 It’s like finding a little gremlin tinkering in the gears of your masterpiece, causing it not to work quite right. Squashing these bugs might feel daunting, but it’s a crucial step towards a smooth, user-friendly app.
In the world of app development, becoming a bug-busting hero is all part of the journey. Think of your app as a living, breathing thing. Just like us, it might catch a cold – or in tech terms, a glitch. Your tool to check its health is the debugger, a wonderful built-in doctor that helps you find the cause of your app’s sniffles! 🩺
Let’s decode the steps to a bug-free app with a bit of exploration. First up, keep an eye on the ‘Logcat’ within Android Studio. Like reading tracks in the dirt, it offers clues to where your app may be tripping up. But what if the tracks lead to a forest of code? Here’s where ‘breakpoints’ shine. They let you pause your app and examine the values of variables at that moment in time, much like capturing a picture in a dynamic scene. 📸
And sometimes, even with all the right tools, you can’t seem to find the culprit. Don’t worry, your fellow developers are your allies! Seek advice from the community on sites like Stack Overflow, or collaborate with teammates who might spot something you missed.
Finally, keeping your app’s bugs at bay also means being smart about testing. Cover all your bases with unit tests that check individual sections of code for errors, and with integration tests that ensure that all parts of your app work together harmoniously.
Here’s a simple table to help you sort out your bug-squashing toolkit:
| Tool/Technique | Description | How It Helps |
|---|---|---|
| Logcat | Logs details about app processes | Identifies errors and exceptions |
| Debugger | Pauses and inspects app at runtime | Finds and fixes issues in code behavior |
| Breakpoints | Pauses code execution at specific lines | Allows detailed inspection at critical points |
| Community Forums | Platforms for developer collaboration | Provides solutions and advice from experienced peers |
| Unit/Integration Testing | Automated testing of code sections/app integration | Gauges app reliability and functional integrity |
Remember, debugging is not a roadblock, but rather a stepping stone that leads to a more reliable, user-friendly app. Embrace the challenge, and soon, you’ll be launching your app with confidence! 🚀
Deployment: Launch Your App Successfully 🚀
Picture this: after much coding, designing, and testing, you’re on the brink of introducing your android app to the world. It’s a thrilling moment! But there’s one final hurdle – making it accessible to users out there, eager for your creation. Here’s where the magic happens; you’re about to cinch the deal with careful steps and a sprinkle of patience. First, ensure your app shines with user-friendly features and zips free of glitches – users love that! Then, dive into the checklist that Google Play provides – it’s like a treasure map guiding your app to the store’s shelves. Don’t overlook the importance of eye-catching visuals and a captivating description; these are your app’s handshake with potential users.
As you submit your app, there’s a buzz of anticipation; it’s the quiet before the celebration! Now, while waiting for the approval, use this time wisely. Craft a marketing plan spiked with creativity – think social media shoutouts, tantalizing teasers, and maybe even a promo video? And remember, feedback is your new best friend. Encourage it, bask in it, and use it to make your app even better. Launch day arrives, and it’s not just a release; it’s the start of an exciting journey. So, get ready to monitor performance, gather user love (and gripes), and keep polishing – because the best apps out there are those that evolve with their audience. 🎈📱🌟


